

You tin run across the lawsuit on this icon below: endeavour moving your mouse from the left, right, as well as above.
hover right hover top hover left hover bottom 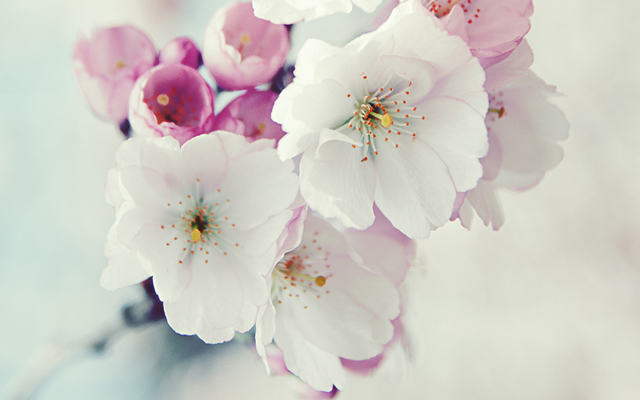
Adding Hover Effect From Different Directions on Blogger Images
First affair to exercise is to add together the CSS agency to our Template:Step 1. From Blogger Dashboard, become to Template as well as press the Edit HTML button
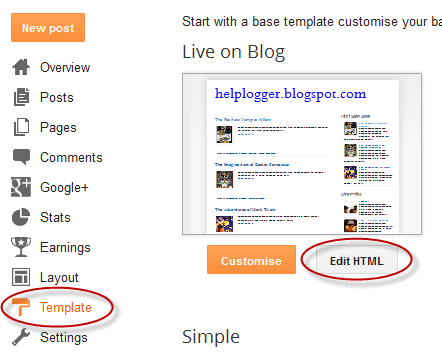
Step 2. Search for the </head> tag - to uncovering it, click anywhere within the code area, press CTRL + F keys as well as type it inward the search box.

Step 3. After you lot works life it, add together the next agency simply inward a higher identify it:
<style>Step 4. Save the Template
/* The container as well as the icon */
div.multi-hover {
overflow: hidden;
position: relative;
vertical-align: middle;
width: 100%;
height: 358px;
line-height: 358px;
}
div.multi-hover img {width: 100%;}
/* The texts that, yesteryear default, are hidden */
div.multi-hover bridge {
color: #FFF;
font-size: 32px;
font-weight: bold;
height: 100%;
opacity: 0;
position: absolute;
text-align: center;
transition: all 0.3s linear 0s;
width: 100%;
}
/* And this is what volition generate the lawsuit */
div.multi-hover span:nth-child(1) { /* correct */
background: none repeat scroll 0 0 rgba(255, 189, 36, 0.6);
left: 90%;
top: 0;
}
div.multi-hover span:nth-child(2) { /* hap */
background: none repeat scroll 0 0 rgba(106, 170, 255, 0.6);
left: 0;
top: -80%;
}
div.multi-hover span:nth-child(3) { /* left */
background: none repeat scroll 0 0 rgba(204, 87, 166, 0.6);
left: -90%;
top: 0;
}
div.multi-hover span:nth-child(4) { /* bottom */
background: none repeat scroll 0 0 rgba(97, 181, 115, 0.6);
left: 0;
top: 80%;
}
div.multi-hover span:hover {opacity: 1;}
div.multi-hover span:nth-child(2n+1):hover {left: 0;}
div.multi-hover span:nth-child(2n):hover {top: 0;}
</style>
Now nosotros are going to add together the HTML that is zero but a DIV where nosotros included 4 SPAN tags alongside texts as well as an image:
Step 5. Choose Posts, exercise a New Post, click on the HTML tab (1) as well as glue this code within the empty box:
<div class=multi-hover>Add your ain text/description to "hover right", "hover top", "hover left" as well as "hover bottom" (2) as well as supersede the url inward bluish alongside the icon URL (3) where you lot desire to apply the effect.
<span>hover right</span>
<span>hover top</span>
<span>hover left</span>
<span>hover bottom</span>
<img src="https://blogger.googleusercontent.com/img/b/R29vZ2xl/AVvXsEgppu_xGO4DGkKspsrFohM0-_cS-HxkD37mAUIMBZ7gu_NbS84aUuE3kg7UfS87HA4ZacrTc3bjFRavBG1YRRKjHdypLOfH0xZJS7B3dyECs_-Hi9eG-fiotcopwBxJMbWG9pdrbfQx1fk/s1600/flowers">
</div>
Important! Do non click on the Compose tab, otherwise the changes volition endure lost.

Step 6. After you lot finished editing your post, click Publish (4)
And that's it... enjoy! :)
Comments