
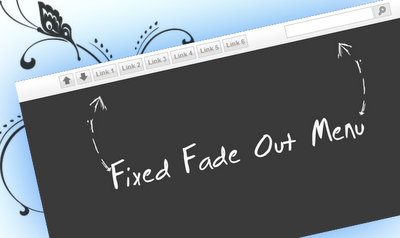
Inside the navigation nosotros accept unopen to links, a search input too transcend & bottom buttons making it easier for the user to navigate to the transcend or bottom of the page.
If you lot desire to add together this horizontal card amongst CSS/jQuery to a Blogger blog, follow the steps below:
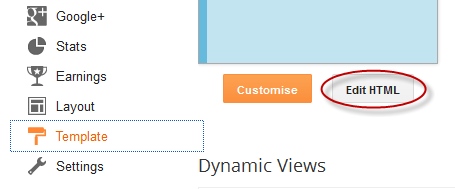
1. Log into your Blogger work concern human relationship too choose your blog, too thus give-up the ghost to "Template" too press the "Edit HTML" button.
2. Click anywhere within the code surface area too search using CTRL + F keys, this tag:
</head>3. Just above/before the </head> tag, add together the next scripts too CSS code for the jQuery menu:
<style type="text/css">#nav{height:35px;border-bottom:1px enterprise #ddd;position:fixed;top:0;left:0;right:0;background:#fff url(https://blogger.googleusercontent.com/img/b/R29vZ2xl/AVvXsEjYHhnc0f0E0NCGuufsjt3t9tDE9aMxkp5Q_l2E4612cFtgYx4emoy9pdJE8MRRmba1clIZU9WoB3WyhwA0DEkq24ysT16M0g8TEJIKRyjSjjD2-jrx_GeQRN5Mkp-Wr1VNdTt74XcIZBWN/s1600/navbar.png) repeat-x centre left;z-index:999999}#nav ul{height:25px;list-style:none;margin:6px machine 0;width:600px}#nav ul li{display:inline;float:left;margin:0 2px}#nav a{font-size:11px;font-weight:700;float:left;padding:2px 4px;color:#999;text-decoration:none;border:1px enterprise #ccc;cursor:pointer;background:transparent url(https://blogger.googleusercontent.com/img/b/R29vZ2xl/AVvXsEg-aLLnof2K1Cu-JIDcqoGEOa9acJYaGI7eGwM2_K3Bzey93cuRtPMbCpEyPcdxZibd_GivHGcQeQBgumESbwyQ1K2o0PZwdpesKw25HKQASMYwZg2ELEACI54A9w-Khn1qbJodbyDKCLMM/s1600/overlay.png) repeat-x centre left;height:16px;line-height:16px}#nav a:hover{background-color:#D9D9DA;color:#fff}#nav a.top span,#nav a.bottom span{float:left;width:16px;height:16px}#nav a.top span{background:transparent url(https://blogger.googleusercontent.com/img/b/R29vZ2xl/AVvXsEg-nRFWw3NuzeArpGwOGUg3xj2-SAHvGWetspcO4Vup3ULMJQ-kDR5HzNyU-mlX55GtGRPdqehPmRdCVjYrd_MZN8NXkTxACkruCJDoNv5sFGnfhI9tIUOSlRrnTgAGcNZkjKGSV69SXOZb/s1600/top.png) no-repeat centre center}#nav a.bottom span{background:transparent url(https://blogger.googleusercontent.com/img/b/R29vZ2xl/AVvXsEhrOA2Mwo4k0o1iylRl9k8X1e9rttA9vMgyVMisndFDMAVBwAFF0r1mPlwnbB0Qsrj7vMbUSMr0x7H5qexaicO0BmgBQfgnuEKEcDtR2D2hAJd-wA4VxlIBYkgNd_jUqdG8eS3zNum_1jO1/s1600/bottom.png) no-repeat centre center}#nav ul li.search{float:right}#nav input[type="text"]{float:left;border:1px enterprise #ccc;margin:0 1px 0 50px;padding:2px;line-height:16px}input.searchbutton{border:1px enterprise #ccc;padding:1px;cursor:pointer;width:26px;line-height:16px;background:#E8E9EA url(https://blogger.googleusercontent.com/img/b/R29vZ2xl/AVvXsEgfeTAU0I5bp-Bhx5SlabvzMreBg021k_5PTof5JNGO9FN2Ads2RJpPIIg00IGyiQRGhexoCcJGIt9QUyRyht-a0jSMOwWO30tXwmeP2rwgPFHKhZxpo7F5tdIYxXq1XjFhyphenhyphenpgXwlx-jbQz/s1600/search.png) no-repeat centre center}input.searchbutton:hover{background-color:#D9D9DA}</style>4. Next, search for this tag:
<script type="text/javascript" src="https://code.jquery.com/jquery-1.3.2.min.js"></script>
<script type="text/javascript">//<![CDATA[
$(function(){$(window).scroll(function(){var a=$(window).scrollTop();0!=a?$("#nav").stop().animate({opacity:"0.2"},400):$("#nav").stop().animate({opacity:"1"},400)}),$("#nav").hover(function(a){var b=$(window).scrollTop();0!=b&&$("#nav").stop().animate({opacity:"1"},400)},function(a){var b=$(window).scrollTop();0!=b&&$("#nav").stop().animate({opacity:"0.2"},400)})});//]]></script>
<body>If you lot can't detect it, search for this one:
<body expr:class='"loading" + data:blog.mobileClass'>5. Just below/after this code, re-create too glue the HTML construction of the menu:
<div id="nav">Note: Replace URL address amongst the URL of your pages too Link 1, 2, 3, 4, 5, 6 amongst the link championship that volition exhibit inwards the menu.
<ul>
<li><a class="top" href="#top"><span></span></a></li>
<li><a class="bottom" href="#bottom"><span></span></a></li>
<li><a href='URL address'><span>Link 1</span></a></li>
<li><a href='URL address'><span>Link 2</span></a></li>
<li><a href='URL address'><span>Link 3</span></a></li>
<li><a href='URL address'><span>Link 4</span></a></li>
<li><a href='URL address'><span>Link 5</span></a></li>
<li><a href='URL address'><span>Link 6</span></a></li>
<li class="search">
<form method="get" action="/search">
<input name="q" type="text" placeholder="Search..."/><input type="submit" value="" class="searchbutton"/>
</form>
</li>
</ul>
</div>
<div id="top"></div>
6. Finally, search for the next tag:
</body>Just higher upwardly the </body> tag, add together the next HTML code:
<div id="bottom"></div>7. Click the "Save Template" push clit too you're done adding the menu. Enjoy!
Credit: Tympanus. This card was inspired yesteryear David Walsh's transcend navigation bar.
Comments